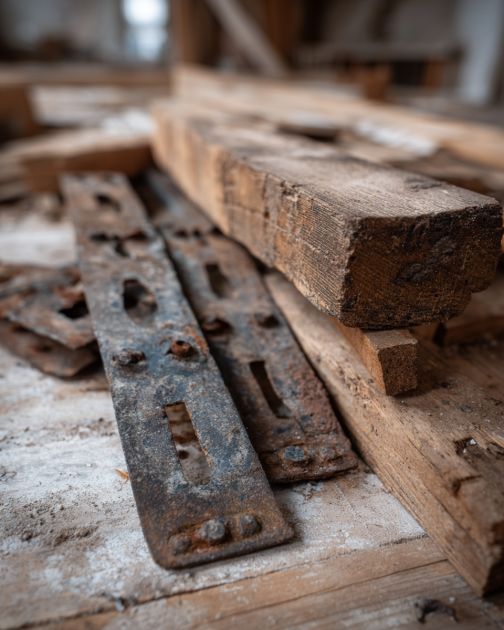
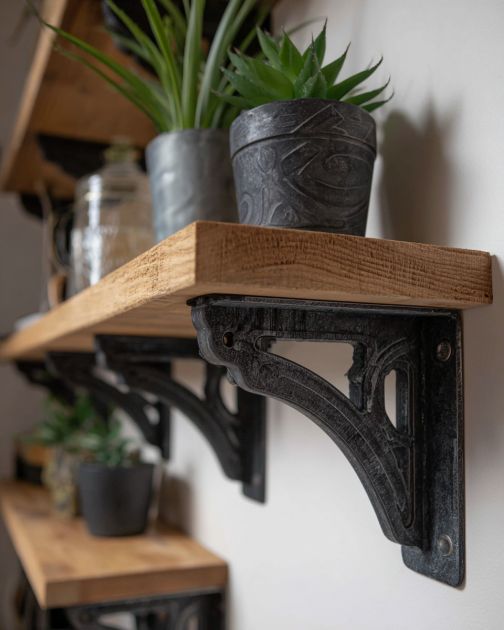
In the world of DIY home projects, creativity knows no bounds. One innovative trend that has been gaining traction is the transformation of old metal brackets into stylish industrial shelf supports by simply flipping them upside down. This overlooked idea not only breathes new life into discarded materials but also offers a chic, industrial aesthetic that can elevate any room’s decor. Perfect for those looking to add a touch of industrial charm to their living space, these repurposed brackets serve as a testament to the power of creativity and sustainability in interior design.
When incorporating these industrial shelf brackets into your home, consider pairing them with reclaimed wood for a rustic look or sleek glass for a more modern feel. These brackets can complement a variety of styles from urban lofts to farmhouse chic. For a cohesive look, use them in rooms with exposed brick or stone, and incorporate other metal accents such as light fixtures or planters. The raw, unfinished look of metal brackets can be softened with natural elements like plants or woven textiles, creating a balanced and inviting atmosphere.
Upside-Down Industrial Shelf Brackets
Materials
Old metal brackets (at least 6 inches in length)
Screws (suitable for your wall type)
Wall anchors (if necessary)
Drill
Level
Measuring tape
Shelf board (wood, glass, or your preferred material)
Directions
Begin by gathering your old metal brackets. Clean them thoroughly to remove any rust or dirt.
Flip the brackets upside down so the part that would traditionally attach to the wall now supports the shelf.
Determine the placement of your shelf and use a level to ensure it will be straight.
Mark the wall where you plan to install the brackets. Use a measuring tape to ensure equal spacing between them.
Drill holes at the marked spots and insert wall anchors if necessary to support the weight.
Attach the brackets to the wall using screws, ensuring they are securely fastened.
Place your shelf board on top of the brackets, adjusting as necessary to ensure it is level.
Secure the shelf to the brackets if desired, using small screws through the underside of the brackets.
Variations & Tips
For those looking to customize their flipped metal bracket shelves, consider painting the brackets in a matte black or metallic finish to match your decor. Alternatively, leave them in their original state for a more rustic, vintage feel. If you’re aiming for a more eclectic look, mix and match different styles of brackets. For additional functionality, consider adding hooks to the bottom of the brackets to hang mugs in a kitchen setting or accessories in a bedroom. Remember, the key to successful DIY is personalization, so don’t hesitate to experiment with different materials and configurations to make the project truly your own.